This option is available in the Donorfy Professional plan but not the Essentials plan
This web widget allows you to add functionality to your website to take one off or recurring payment card donations.
A web widget comprises HTML code which you will add to a page on your website to allow a donation to be made.
Before you can add the widgets you need to:
- Connect Donorfy to Stripe - Stripe is the organisation that will process the payment on your behalf see the knowledge base article 'Connecting to Stripe' for details
- Registered for Google reCaptcha v3 and pasted the reCaptcha secret keys into your Donorfy configuration - see this article for more info - this is to help prevent fraudsters from using your Stripe web widgets for card testing
- Once you have set up your Stripe account you need to login to your Stripe account and find your publishable key - the Stripe documentation will tell you how to that
- Add pages to your website - the minimum you will need is
- a page to host the web widget - e.g. a make a donation page
- a thank you page which is displayed when a donation is made
You can add as many web widgets as you want - for example, to make donations to different funds or on landing pages for different campaigns. You can use the same ‘thank you’ page for many web widgets.
Creating the Widget
In Donorfy open the settings and find the web widgets - add a new widget as follows:
- Give the widget a meaningful description
- Complete the Website Settings section
- Choose 'Payment Card Donation using Stripe' as the type of widget you want
- Enter the Stripe Publishable key
- Enter the URLs of the page to display to thank a donor
- Complete the Transaction Settings section - this settings are used to correctly process donations received, the Product and Payment Method must be entered, the other settings are optional
- You can specify the different acknowledgements you want to use depending on whether you want to send the acknowledgement by email or mail - these work as follows:
- if you specify an email acknowledgement and the donor provides an email address then the email acknowledgement will be used
- if you do not specify an email acknowledgement or the donor does not provide an email address any mail acknowledgement will be used - provided the donor has provided a postal address
- Transaction-related acknowledgements are used for one-off donations, Recurring payment instructions acknowledgements are used for recurring gifts
- If you prefer to use Mailchimp instead of an Acknowldgement a Mailchimp Automation can be assigned to the Web Widget - for further information please see this article: Initiating Mailchimp Automations or Supporter Journeys from Donorfy
Please note
Mailchimp are in the process of sunsetting the Classic Automations feature. The option is now only available to accounts that have previously created a Classic Automation. Click here for further details
If your Mailchimp account does not have this feature, the suggestion is to use a Donorfy Trigger coupled with the Supporter Journey option.
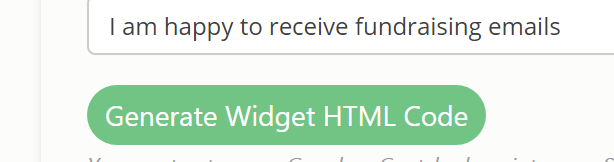
- Save the widget and re-open it
- Press the Generate Widget button
- Paste the copied HTML code into the donation page on your website, when you paste the widget code is has to be pasted in as HTML (or mark up) rather than just as 'content'.
How that is exactly done depends on your website.
Often when you go to the screen where you would add or edit a page there is an option to switch modes from content to HTML - there may be a button or tab labelled 'text' you have to click on which switches modes - if you are using Wordpress so this may help, whoever looks after your web site may be able to help you.
- Save and publish the page
Testing the Web Widget
After you have added the widget to your site you can enter a test donation using
- Test donor information e.g. John Smith, email john.smith@test.com
- Test card details of
- card number: 4242424242424242
- card type: Visa
- expiry date: any valid date in the future in the format month/year
- cvc code: 123
The test payment will be passed to Stripe, then a confirmation will be received and displayed on the page noting that the payment had failed due to being a known test card.
To test end-to-end, you will need to make a donation with a live bank card. Once the payment has been accepted by Stripe, it will be passed back to Donorfy and the Thank you page displayed.
If you then go into Donorfy and search for your test donor you will find the transaction and if it was a recurring donation their recurring payment instruction on their timeline.
Changing the Widget
If you change anything in the Website Settings section of the widget then you need to re-generate the Widget and copy the HTML code to your website
If you change anything in the Transaction Settings section then you don’t need to re-generate the widget - your new settings will be used for new donations as they are received.
Donation Processing Details
If you open a donation made via a web widget and display the payment details you can see the card information and transaction codes - as shown in the example below

Donations from Existing Donors
When we receive details of donation we will try to find an existing donor using the email address entered, if we have
- No matching email address we will add a new donor and add the transaction to the new donors timeline
- One matching email address we will add the transaction to the existing donors timeline
- More than one matching email address we will add the transaction to the list found under Financial | Online Donations - this allows you to choose which constituent the donation should be recorded against.
Donations that Fail
If a donation cannot be collected - e.g. due to a lack of available funds - then a message will be displayed to the donor at the time
Editing the HTML in the Generated Widget
After you paste the widget HTML into your website you can edit it - e.g. make the style consistent with the rest of your website, change the layout, add graphics, change the wording etc. The key things are that you must NOT change are:
- The form tag
- The ids, names and maximum field lengths of the input fields
- The hidden fields at the end of the generated HTML - after the comment 'Do not change these values' - these are used to control the operation of the widget.
For further information on Web Widgets and Troubleshooting please see this section of the Knowledge Base: Web Widgets
Comments
What is the right way to edit the HTML to set the marketing checkbox to default to Opt-In rather than Opt-Out?
You could
1) change the HTML for the opt in box to include the keyword checked e.g. <input id="KeepInTouch" type="checkbox" checked/> - this will mean the box is ticked by default
2) Change the wording next to the box so its clear a donor needs to untick the box to opt out
Can the constituent's title be added to the web widget?
Yes - we have recently added that - there are 2 options
Option 1 - Go into Settings find the widget and regenerate it then copy it to your site - re-make any changes to layout, styling etc
Option 2 - Manual change - this is better If you don't want to re-generate the web widget and copy it to your site - so you don't lose any styling, layout etc you have applied to your page
You will need to find the page(s) on your web site that have the stripe donation page and
1) Change the stripepayments javascript file to reference the stripepayments_2016.7.js version i.e.
2) Add the mark up for the title field to the correct place on your form - the key thing is that the id of input field is title - i.e .
Can the widget be used on Facebook?
Sorry no it won't work with Facebook - its is designed to plug into your website